Recent Posts
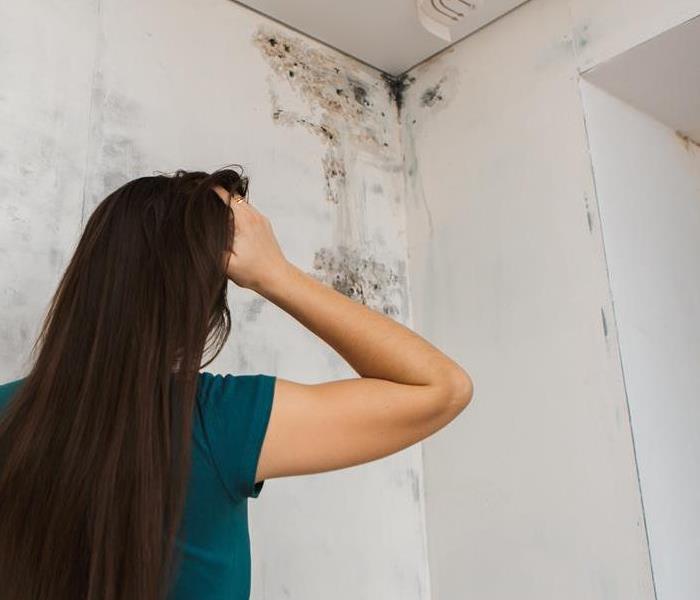
Mold Growth in Humid South Climates: Prevention and Remediation Strategies
1/4/2024 (Permalink)
Living in the humid climates of the southern regions comes with many advantages, but it also brings its fair share of challenges. One of the major concerns homeowners face in these areas is the prevalence of mold growth. The high humidity levels create an ideal environment for mold to thrive, leading to property damage. In this blog, we will explore the causes of mold growth in humid south climates, as well as effective prevention and remediation strategies to safeguard your home and health.
Understanding the Causes of Mold Growth in Humid South Climates
Explain how the combination of warm temperatures and high humidity creates the perfect breeding ground for mold. Discuss the impact of inadequate ventilation, water leaks, and condensation on promoting mold growth in homes. Highlight common areas in the house prone to mold growth, such as bathrooms, kitchens, basements, and crawl spaces.
Effective Prevention Strategies
Explore preventive measures to reduce the risk of mold growth in humid climates, such as controlling indoor humidity levels. Discuss the importance of proper ventilation, including the use of exhaust fans, dehumidifiers, and maintaining adequate airflow throughout the home. Highlight the significance of promptly addressing water leaks, repairing damaged pipes, and preventing excess moisture accumulation.
Mold Remediation Techniques
Outline the steps involved in mold remediation, including containment, removal, and thorough cleaning of affected areas. Discuss effective cleaning solutions, such as bleach or vinegar, to remove visible mold growth. Highlight the importance of hiring professional mold remediation services for extensive or recurring mold problems.
Ongoing Maintenance and Good Practices
Discuss the significance of regular inspections to identify any potential moisture sources or mold growth in the early stages. Highlight the importance of maintaining proper ventilation systems, cleaning and drying wet or damp areas promptly, and using mold-resistant materials when renovating or building. Educate homeowners on the importance of monitoring indoor humidity levels and using hygrometers to ensure humidity remains within the recommended range.
Mold growth in humid south climates is a common and persistent challenge for homeowners. By understanding the causes, adhering to preventive strategies, and taking prompt action when mold is detected, you can protect your home and health from the damaging effects of mold growth. Remember, prevention is key, but if a mold issue arises, seeking professional mold remediation services is crucial to ensure thorough and effective removal. Take control of mold growth in humid climates to create a safe and healthy home environment for you and your loved ones.
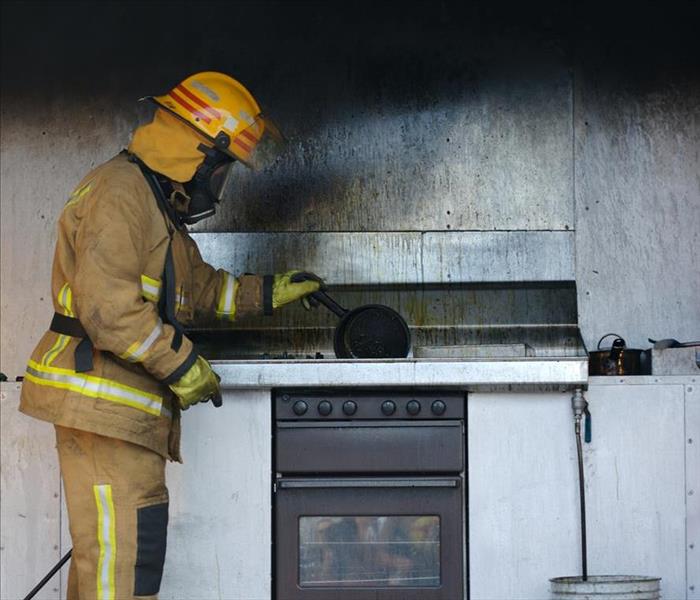
Two Disasters in One: Managing Water Damage During Fire Damage Cleanup
11/27/2023 (Permalink)
When a fire breaks out, tackling the flames is essential, but so is addressing water damage. Firefighting efforts, such as using water or foam, can leave behind a significant amount of water damage. Managing water damage during fire damage cleanup is crucial to prevent further damage to your property and belongings. In this blog, we will explore strategies and techniques for managing water damage during fire damage cleanup.
Safety First
Before beginning any water damage cleanup, it is crucial to ensure the area is safe to enter. There may be electrical hazards, structural damage, or contaminated water. Wear protective gear, including gloves and a mask, as water damage can pose health risks.
Assessing the Damage
Start by assessing the extent of the water damage. Look for signs of waterlogged materials, such as walls, ceilings, floors, and any furniture or belongings affected by water. Carefully evaluate the materials involved, such as wood, drywall, or upholstery.
Removing Standing Water
The first step in managing water damage is to remove any standing water. Use a wet/dry vacuum or a pump to extract water from floors and carpets. Be mindful of water seeping into other areas, such as wall cavities, and use appropriate techniques to extract water from these locations.
Drying Out Affected Areas
Once standing water has been removed, the next step is to dry out affected areas. Use high-powered fans, dehumidifiers, and specialized drying equipment to dry out walls, floors, and furniture. It's crucial to address water damage as soon as possible, as mold can develop within 24-48 hours.
Addressing Mold Growth
Mold can be a serious health hazard, and it thrives in humid environments. Even if you don't see any visible mold, it's important to address the potential for growth. Use mold-killing solutions or consult professional mold remediation services to ensure a thorough removal of any mold.
Rebuilding and Restoration
After managing water damage, it's time to address fire damage cleanup and begin restoration and rebuilding efforts. Consult with professional contractors and restoration services to evaluate the extent of damage and to guide the restoration process. This may involve repairing and repainting walls, replacing flooring, repairing or replacing furniture and belongings.
Preventing Future Damage
Taking steps to prevent future water damage is crucial to protect your property and belongings. This includes ensuring proper drainage around the home, maintaining gutters and downspouts, regular inspection of pipes and plumbing, and installing drainage or sump pump systems in flood-prone areas.
In conclusion, managing water damage during fire damage cleanup is essential to prevent further damage to your property and belongings. Tackling water damage involves assessing the extent of damage, removing standing water, drying out affected areas, addressing mold growth, rebuilding and restoration and preventing future damage. It's crucial to address water damage as soon as possible, as mold can develop quickly. Consult with professional services to ensure a thorough cleanup and restoration. With appropriate management of water damage, you can rise from the ashes and restore your property to its original condition.
Restoring Belongings and Preventing Mold After a Water Loss
10/26/2023 (Permalink)
 Recovering from a water loss can be challenging to prevent mold damage.
Experiencing a water loss can be overwhelming, especially when it comes to salvaging your belongings and preventing mold damage. In this blog, we will explore effective strategies for restoring your belongings after a water loss and minimizing the risk of mold growth.
Remove Standing Water Promptly
The first step in preventing mold after a water loss is to remove standing water as quickly as possible. Use pumps, wet/dry vacuums, or mops to extract the water from affected areas. Pay attention to hidden or hard-to-reach spaces, such as crawl spaces or behind walls, to ensure thorough water removal.
Dry Affected Areas Thoroughly
After removing standing water, it is crucial to thoroughly dry the affected areas. Use fans, dehumidifiers, and open windows to promote airflow and facilitate drying. Focus on areas that are prone to moisture retention, such as carpets, furniture, and walls. Consider using specialized techniques, such as air movers or desiccant drying, to speed up the drying process.
Clean and Sanitize Belongings
Items that have been affected by water damage should be cleaned and sanitized to prevent mold growth. For non-porous or hard surfaces, use a mild detergent and water solution to clean and disinfect. Fabric materials, such as clothing or upholstery, may require professional dry cleaning or specialized cleaning methods. It's also essential to clean and sanitize items that may have come into contact with contaminated water, such as kitchen utensils and dishes.
Inspect for Mold and Take Preventive Measures
Even after thorough drying and cleaning, it's important to inspect the affected areas for any signs of mold growth. Pay close attention to hidden areas, corners, and areas with poor airflow. If mold is present, consider seeking professional assistance to assess and remediate the situation. Furthermore, to prevent mold growth in the future, ensure proper ventilation in your home, address any water leakage or moisture issues promptly, and consider using mold-resistant products during the restoration process.
Document and Prioritize Restoration Efforts
As you navigate the process of restoring your belongings after a water loss, it's important to document your restoration efforts and prioritize which items to address first. Create a comprehensive inventory of the affected items, noting their condition and any necessary restoration actions. This will help you stay organized and ensure that all necessary steps are taken. Prioritize restoration based on the value, sentimentality, and functionality of the items. By being systematic and strategic in your approach, you can maximize the effectiveness of your restoration efforts and minimize any potential further damage or loss.
Recovering from a water loss and preventing mold damage can be a challenging process. By promptly removing standing water, thoroughly drying affected areas, cleaning and sanitizing belongings, inspecting for mold, and taking preventive measures, you can effectively restore your belongings and minimize the risk of mold growth. Following these strategies will help you regain a sense of normalcy in your home environment.
Addressing Water Damage in Multi-Story Buildings: Condos and Apartments
10/18/2023 (Permalink)
 Addressing water damage from multi-story buildings quickly to prevent secondary damage.
Water damage can be a significant concern in multi-story buildings such as condos and apartments. When water leaks or floods occur, they can quickly impact multiple units and cause extensive damage. In this blog post, we will discuss essential steps to address and mitigate water damage in multi-story buildings, ensuring a prompt and effective response.
Immediate Reporting and Communication
In a multi-story building, it is crucial to have clear communication channels in place. Tenants should be educated on the importance of immediately reporting any water leaks or damages to the property management or building maintenance team. Prompt reporting enables swift action and prevents further damage.
Shut Off the Source
If possible, identify and shut off the source of the water leak. This could involve turning off the main water supply valve or individual valves for affected units. Acting quickly to stop the flow of water can minimize damage and prevent it from spreading to other units.
Notify Neighboring Unit
In multi-story buildings, it is essential to promptly inform neighboring units about any water damage incident. This allows residents to take necessary precautions and protects them from potential hazards or further damage. Establish a communication protocol to ensure swift notification in case of emergencies.
Request Professional Help
Engage the services of water damage restoration professionals who specialize in handling multi-story buildings. These experts have the necessary equipment, expertise, and resources to effectively mitigate water damage and restore the affected areas. They can assess the extent of the damage, perform necessary repairs, and prevent mold growth.
Document Damage and Insurance Claims
Take photographs or videos of the water damage, as these will be valuable for insurance claims and documentation. Notify your insurance provider immediately to initiate the claims process and ensure that you provide accurate and thorough documentation of the damage.
Coordinate Repairs and Restoration
In multi-story buildings, repairs and restoration activities need to be coordinated to minimize disruption to residents. Property management should work closely with restoration professionals and residents to establish a comprehensive plan that addresses repairs, timelines, and any necessary relocations.
Prioritize Preventative Measures
To prevent future water damage incidents, implement preventative measures such as regular plumbing inspections, maintenance of drainage systems, and addressing any known vulnerabilities in the building's infrastructure. Educate residents about proper maintenance practices and the importance of promptly reporting any issues.
Transparent communication is crucial during the water damage restoration process. Keep residents informed about the progress of repairs, expected timelines, and any necessary temporary accommodations. Regular updates help manage expectations and minimize uncertainty.
Addressing water damage in multi-story buildings requires a coordinated effort between residents, property management, and water damage restoration professionals. By establishing clear communication channels, taking immediate action, and prioritizing preventative measures, the impact of water damage can be minimized, and the building can be restored to a safe and habitable condition.
Mold Growth in your home or business after a storm: Prevention and Remediation
9/21/2023 (Permalink)
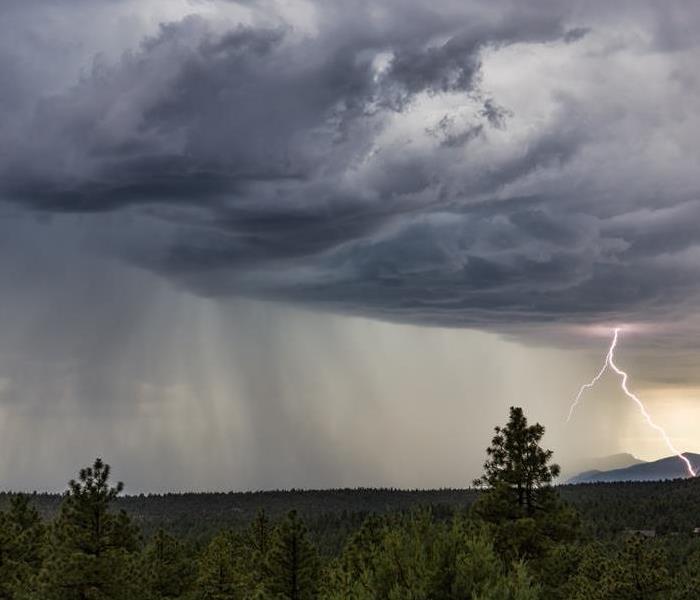 When storm damage passes secondary damages can be left behind. Hire a professional for your storm damage cleanup
When a storm strikes in South Central climates, it can leave behind moisture, which can lead to mold growth. In humid areas like this, mold can spread quickly and cause structural damage. In this blog post, we will discuss the prevention and remediation of mold growth after a storm in South Central climates.
After a storm, one of the most common types of damage that homeowners and businesses face is mold damage. When excessive moisture is left behind from the storm, it creates the perfect environment for mold to flourish. Mold can quickly grow on various surfaces, including walls, ceilings, carpets, and furniture. Not only does mold cause unsightly stains and a musty odor, but it can also lead to structural damage if left untreated. It is essential to address and remediate mold damage promptly and effectively after a storm to prevent further deterioration and maintain a safe and healthy environment.
Prevention
The best way to prevent mold growth after a storm is to act quickly. As soon as possible after a storm, it is important to address any water damage that may have occurred. All moisture should be removed from the home or business to prevent the growth of mold. This can be achieved through the use of fans, dehumidifiers, and open windows. Any furniture or other items that have been affected by water should be removed from the area and dried out.
Proper ventilation is also key to preventing mold growth. Make sure that all air conditioning units and fans are working, and that windows and doors are properly sealed to prevent water from seeping inside. Regular inspections and maintenance of buildings can help to prevent small problems from becoming big issues.
Remediation
If mold has already begun to grow, it is important to seek professional help for remediation. Professional remediation companies can safely remove mold growth, using specialized equipment and procedures that ensure it is completely eliminated.
When it comes to mold remediation, time is of the essence. The longer mold is left untreated, the more it can spread, and the harder it is to remove. In addition, mold can pose serious health hazards, especially to those with respiratory problems or compromised immune systems. While DIY mold remediation may seem like an option, it is always best to seek professional help for the safe removal of mold.
In humid South Central climates, mold growth can pose a serious problem after a storm. Prevention through quick action and proper ventilation is key to avoiding any mold growth. However, if mold growth has already taken hold, professional remediation is necessary to safely and completely remove it. During the post-storm response, homeowners and businesses should be vigilant for signs of mold growth and seek professional help as soon as any is discovered.
Fire Extinguisher 101: A Closer Look at Foam, Water, and Dry Chemical Extinguishers
8/13/2023 (Permalink)
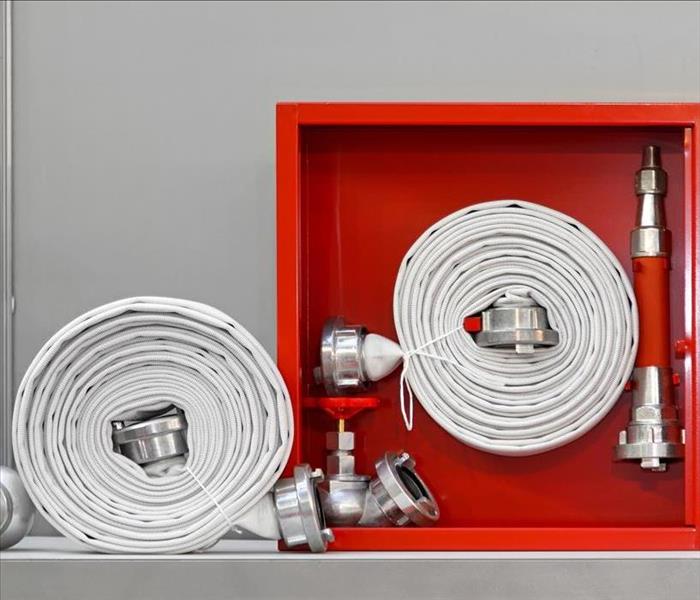 By familiarizing yourself with fire extinguishers, you are better equipped to protect your home or property against potential fire hazards.
As a homeowner or property owner, understanding fire safety is paramount to protect your loved ones and investments. One essential tool in your fire safety arsenal is a fire extinguisher. In this article, we will take a closer look at three common types of fire extinguishers: foam, water, and dry chemical. By understanding their unique properties and applications, you can make an informed decision about which extinguisher is right for your needs.
Foam Fire Extinguishers
Foam fire extinguishers are versatile and effective against Class A and Class B fires. Class A fires involve ordinary combustible materials like wood, paper, or textiles, while Class B fires involve flammable liquids such as gasoline or oil. The foam creates a barrier, suppressing the fire and preventing re-ignition. These extinguishers are commonly found in homes, offices, and areas with a variety of fire risks.
Water Fire Extinguishers
Water fire extinguishers are specifically designed for Class A fires. They are not suitable for use on flammable liquids or electrical fires. Water extinguishers work by cooling the fire and reducing the temperature below the ignition point. It's important to note that water extinguishers should never be used on electrical equipment or fires involving electrical hazards.
Dry Chemical Fire Extinguishers
Dry chemical fire extinguishers are highly effective against Class A, Class B, and Class C fires. Class C fires involve energized electrical equipment. These extinguishers contain a fine powder that chemically interrupts the combustion process, extinguishing the fire. Dry chemical extinguishers are commonly found in industrial settings, workshops, and places with electrical equipment.
Key Factors to Consider
- Fire Classifications: Understand the different classes of fires (A, B, C) to determine which fire extinguisher is appropriate for a specific fire hazard.
- Fire Risks: Assess the potential fire risks in your home or property to determine the types of fire extinguishers you may need.
- Placement and Accessibility: Install fire extinguishers in easily accessible locations, ensuring they are visible and within reach during an emergency.
- Maintenance and Inspections: Regularly inspect and maintain your fire extinguishers according to manufacturer guidelines to ensure their functionality.
By familiarizing yourself with foam, water, and dry chemical fire extinguishers, you are better equipped to protect your home or property against potential fire hazards. Remember to evaluate the fire risks specific to your environment and choose the appropriate extinguisher accordingly. Regular maintenance, proper placement, and awareness of their limitations are crucial for effective fire safety. Invest in the right fire extinguishers today, and gain peace of mind knowing you have taken an important step in safeguarding your loved ones and property.
Everything You Need to Know About Machine Leaks
7/14/2023 (Permalink)
Machine leaks can be a common and frustrating issue in households and commercial settings. Whether it's a washing machine, refrigerator, or other appliances, a leak can cause significant water damage if not addressed promptly. In this blog, we will provide you with a comprehensive guide on machine leaks. We'll explore the common causes behind machine leaks, discuss preventive measures to avoid such incidents, and guide you through the restoration process if you encounter a machine leak in your home or business.
Causes of Machine Leaks
Machine leaks can occur due to various reasons, including aging or worn-out seals or gaskets, damaged or loose hoses, malfunctioning valves, and clogged or blocked drain lines. In washing machines, overloading, using excessive detergent, or an unbalanced load can also lead to leaks. Similarly, in refrigerators, a faulty defrost drain or damaged water supply line can cause leaks.
Preventing Machine Leaks
Taking preventive measures can help you avoid the hassle and potential water damage caused by machine leaks. Regularly inspect and maintain your appliances, ensuring that seals, gaskets, and hoses are in good condition. Clean or replace filters and remove any debris or blockages from drain lines. Follow manufacturer guidelines for proper usage, load size, and detergent quantities. For refrigerators, inspect and replace damaged or kinked water supply lines, and periodically clean the defrost drain to prevent clogs.
Restoration Process for Machine Leaks
If you discover a machine leak, it's crucial to address it promptly to prevent further damage. Start by shutting off the machine and disconnecting power or water supply if necessary. If there is standing water, remove it and dry the affected area thoroughly. Identify the source of the leak and repair or replace the damaged component. In cases of extensive water damage, it's recommended to seek professional assistance to ensure proper cleanup, drying, and restoration of any affected materials or structures.
Being aware of the causes of machine leaks and implementing preventive measures can save you from potential water damage and costly repairs. Regular maintenance, timely repairs, and responsible usage practices are essential for avoiding machine leaks. However, if you do encounter a machine leak, swift action and seeking professional help for restoration can help minimize the damage and ensure your property is restored to its pre-leak condition.
Remember, if the extent of the damage is beyond your capabilities, it's advisable to contact a reputable disaster restoration professional, such as our SERVPRO of Kingwood/Humble team. These experts have the knowledge, experience, and specialized equipment to handle machine leaks effectively and efficiently, safeguarding your property and restoring it to its original state.
Frequently Asked Mold Questions: Answers to Common Mold Concerns
5/14/2023 (Permalink)
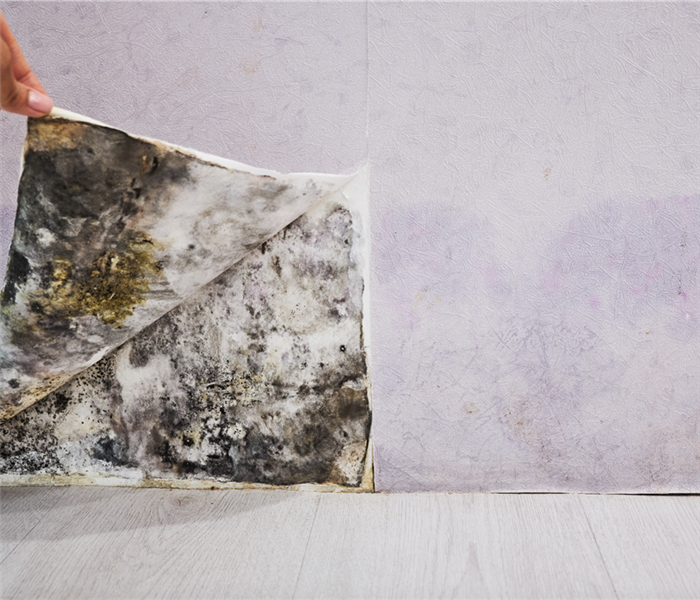 If you suspect mold growth in your home, it's important to have it inspected by a professional to determine the best course of action.
Mold is a common issue that many homeowners face, and it can be a difficult problem to deal with. Here are answers to some frequently asked mold questions that can help you better understand mold and how to address it in your home.
Q: What is mold?
A: Mold is a type of fungus that grows in damp environments. It can grow on a variety of surfaces, including wood, drywall, and carpeting. Mold spores are found in the air all around us and are a natural part of the environment.
Q: How does mold grow?
A: Mold grows when moisture is present. This can be due to a leaky roof or plumbing, high humidity, or flooding. Once mold spores are exposed to moisture, they can begin to grow and spread.
Q: How can I prevent mold growth in my home?
A: The key to preventing mold growth is to control moisture levels. This can be done by fixing any leaks or water damage, using dehumidifiers in areas with high humidity, and ensuring proper ventilation in bathrooms and kitchens.
Q: How can I tell if I have mold in my home?
A: Signs of mold include a musty smell, visible mold growth on surfaces, and the presence of water damage or discoloration on walls or ceilings. If you suspect mold growth in your home, it's important to have it inspected by a professional.
Q: Is all mold dangerous?
A: No, not all mold is dangerous. While some types of mold can produce toxins that can be harmful, most mold is relatively harmless. However, any mold growth in the home should be addressed promptly to prevent it from spreading.
Q: Can I clean up mold myself?
A: It depends on the extent of the mold growth. If the mold is limited to a small area, you may be able to clean it up yourself. However, if the mold covers a larger area or is present in areas with high humidity or moisture, it's best to have it professionally removed.
Q: Will painting over mold solve the problem?
A: No, painting over mold will not solve the problem. The mold will continue to grow underneath the paint, and can eventually cause the paint to peel and flake. It's important to address the mold problem before painting.
Q: Can mold grow in the HVAC system?
A: Yes, mold can grow in the HVAC system if moisture is present. This can lead to mold spores being circulated throughout the home, which can cause health problems for occupants. Regular maintenance and cleaning of the HVAC system can help prevent mold growth.
Understanding Mold and How to Address It
In conclusion, mold is a common issue that many homeowners face, but it can be addressed with proper understanding and preventative measures. By controlling moisture levels, regularly inspecting for mold growth, and addressing any issues promptly, homeowners can prevent mold growth and ensure a healthy living environment. If you suspect mold growth in your home, it's important to have it inspected by a professional to determine the best course of action.
6 Essential Tips for Cleaning Your Gas Stove Safely and Effectively
4/15/2023 (Permalink)
 Cleaning your gas stove is an important part of maintaining its efficiency and safety.
Gas stoves are a popular choice for many homeowners due to their efficiency and ease of use. However, they do require regular cleaning to keep them functioning properly and to ensure that they are safe to use. Here are some tips on how to properly and safely clean a gas stove:
1. Turn Off the Gas
Before you begin cleaning your gas stove, turn off the gas supply. This can usually be done by turning the valve behind the stove clockwise. Once the gas is turned off, make sure that the stove burners are completely cool before you begin cleaning.
2. Remove Burner Grates and Caps
To access the burners, remove the burner grates and caps. These can usually be lifted off the stove surface. Soak them in hot, soapy water for 30 minutes to loosen any grease or grime. Use a scrub brush or sponge to scrub away any remaining dirt or debris. Rinse thoroughly and dry before replacing them on the stove.
3. Clean the Burners
To clean the burners themselves, use a stiff-bristled brush to remove any debris or buildup. You can also use a toothbrush or a wire brush to clean the small holes in the burner. For tougher stains, you can use a mixture of baking soda and water to create a paste. Apply the paste to the burner and let it sit for 15 minutes before scrubbing with a brush. Rinse thoroughly and dry before replacing them on the stove.
4. Clean the Stovetop
To clean the stovetop itself, use a soft cloth or sponge and a mild dish soap to wipe away any grease or grime. Avoid using abrasive cleaners, as these can scratch the surface of your stove. For tougher stains, you can use a mixture of baking soda and water to create a paste. Apply the paste to the stain and let it sit for 15 minutes before wiping away with a damp cloth. Rinse thoroughly and dry.
5. Clean the Control Knobs
The control knobs on your gas stove can also get dirty and greasy over time. To clean them, remove them from the stove and soak them in hot, soapy water for 30 minutes. Use a soft brush or cloth to scrub away any dirt or debris. Rinse thoroughly and dry before replacing them on the stove.
6. Check for Gas Leaks
After cleaning your gas stove, it's important to check for gas leaks before using it again. This can be done by using a solution of equal parts water and dish soap. Apply the solution to the gas connections and valves. If you see any bubbles forming, this indicates a gas leak. If you suspect a gas leak, turn off the gas supply and contact a professional immediately.
In conclusion, cleaning your gas stove is an important part of maintaining its efficiency and safety. By following these tips and using appropriate cleaning products and protective gear, you can clean your gas stove safely and effectively. Remember to always turn off the gas supply before cleaning and to check for gas leaks before using your stove again.
Why Are My Floors Buckling? 3 Common Causes
3/15/2023 (Permalink)
 When your flooring suffers water damage, we are here to help.
Floors are an important part of any home and can be a great investment if you choose the right one. However, when your floors start to buckle or crack, it's an indication that something is wrong. In this article, we'll discuss what causes these issues to happen so that you can learn how to avoid them in the future.
Water Damage
Water can cause buckling in wood floors. When water gets into the wood, the wood naturally expands to accommodate the moisture. This can cause damage to the flooring material.
When it comes to wood flooring, this expansion can happen quickly if there's been an excessive amount of water introduced to your flooring. If your home or business suffers from a water damage event such as a leak or flooding, your floors are at risk!
High Humidity
High humidity can cause your floors to buckle and warp. High humidity is the result of excess moisture in the air, which is caused by water vapor or other liquids that have been introduced into your home's air circulation system. Not only can high humidity cause damage to your flooring, but it can also lead to other issues on your property, such as mold damage. In any case, it is important to keep the humidity levels in check.
To reduce the risk of buckling and warping, you'll want to make sure that you're keeping your home's relative humidity at a reasonable level: between 30% and 50%.
Drastic Temperature Changes
If your floors are buckling, the problem may be due to drastic temperature changes. This is especially common when it comes to wood floors, which can expand and contract depending on their exposure to heat or cold. This change might not occur drastically but can become an issue after just a few seasons.
It's Important to Get Professional Help Right Away
If your floors are buckling, it may be due to any of these problems, so it's important to get professional help right away. Floors can buckle for many reasons, but the most common cause is moisture. When you have excessive water sitting on a surface for too long, the wood begins to expand. This causes them to warp and crack over time as well as causing other problems like mold growth inside your home or business building.
A water leak or high humidity can cause buckling floors. If you see signs of water damage in or around your home or business, call SERVPRO of Kingwood/Humble for all your water damage cleanup and restoration needs.


 24/7 Emergency Service